When you’re ready to take your oral health to the next level, dental floss thread is a great place to start. Dental floss thread is a type of dental floss that’s been wound together into a single strand. It’s available in different widths and lengths, so you can choose what works best for your teeth and gums. It’s an alternative to dental floss or string, which can be hard to maneuver through your mouth when you’re cleaning between your teeth. Dental floss thread allows you to clean in between your teeth more easily, which helps prevent gum disease from taking hold.
Dental floss thread is also great for people who have trouble reaching their back molars or other hard-to-reach areas with traditional toothbrushes or flosses because it provides more flexibility than traditional dental tools while still providing good cleaning results.
Read on to learn more about How To Use Dental Floss Thread, Is Bleeding Gums When Flossing Dangerous?

How To Use Dental Floss Thread
Dentists often recommend brushing your teeth at least twice a day. However, the best time to floss is rarely mentioned. You can floss to remove food debris anytime you want. While sleeping, the amount of saliva and the factors that protect the teeth all decrease. Therefore, flossing before bed and using once per day can bring a better effect. Similar to toothbrushes, you should not share the floss with other people as bacteria can spread.
Many people also wonder if dental floss can be reused after washing and drying since there is a belief that bacteria in the mouth cannot survive in dry conditions. However, the floss will lose its ability to clean teeth after one use and may leave bacteria. Ideally, you should only use one piece of dental floss once at a time.
After that, you should brush your teeth because the toothpaste is in direct contact with the teeth then, and continuous rinsing will help dislodge the remaining plaque between the teeth gaps.
A common mistake when using dental floss is to hold it with the same finger that does the flossing. This may not be very difficult when you clean the incisors but it will be difficult to access the molars. In addition, taking a piece of floss that is too short also makes it difficult to operate.
How to use floss correctly
Dental floss is a thin, soft thread used to clean up any food debris in your teeth. The main action of flossing is a firm but gentle scraping of the tooth from the top down. Do not be so aggressive since you may damage your gums.
If you do not know how to floss, ask your dentist for exact instructions.
1. Take a fresh piece of dental floss
First of all, you need a piece of floss about 46–61cm long to easily hold it firmly. Besides, you will use a fresh section of floss when switch teeth, so taking a long piece of floss will be much more useful.
If the piece of dental floss you take is too short, it is no big deal! You can floss a few teeth first and take a new piece of floss to continue using.
2. Wrap the ends of the piece of floss around your fingers

You should wrap each end of the dental floss around your middle finger. Make several loose wraps around each of your middle fingers until the floss pulls taut. However, do not wrap the floss so tightly that it digs into your skin or cuts off your circulation.
You can also wrap the thread around your index finger if that feels more comfortable and easier.
3. Use a sufficient section of floss
Use your index and thumb fingers to hold a section about 2,5–7,6 cm between your hands. This is the section of floss you use to clean your teeth. Then, when you switch tooth, you will move to the new section of floss and continue flossing.
If you feel better when using a longer section of floss, it is okay to leave more space between your hands.
4. Start cleaning from incisors
Start cleaning the front teeth, then proceed to the sides. Practice cleaning each tooth on each side of the mouth to turn it into a habit. A little tip is that you should follow the same pattern each time to make sure not to miss any teeth.
5. Move floss several times
Gently slide the floss between your teeth and slowly slide it below the gums. However, do not snap the floss down below your gums as this may cause injury and bleeding. To clean your teeth, gently rock your hand back and forth while moving the floss down.
6. Curve the floss into a C shape around your tooth
This helps to clean the teeth as best as possible. When flossing up and down, gently bring the thread down the gum line to reach the root and remove plaques.
You should make 8–10 strokes with the floss on each tooth. If you still feel that food is stuck between the teeth, move on to a new section and floss the teeth again.
7. Don’t forget the inner teeth
Put your hand inside your mouth so that the floss can reach your back teeth. Don’t forget to floss the upper and lower teeth too.
Gum disease and tooth decay often occur in molars because they are hard to reach for cleaning. Thus, you should try to floss them regularly to keep them clean.
8. Rinse your mouth after flossing

After flossing, rinse your mouth to remove any remaining particles. This also gives your mouth a fresh and clean feeling.
Using chlorhexidine mouthwash can destroy almost all bacteria and create a protective barrier around the gums and teeth. Moreover, mouthwash with fluoride also helps to protect the oral cavity.
Maintain oral hygiene habits

1. Floss once per day before bed
You only need to floss once a day and avoid excessive use as it can damage the gums. It is best to floss in the evening before brushing your teeth and going to bed so it can help you to remove food debris and plaque on your teeth.
If you still feel food stuck between your teeth, use some more pieces of floss.
2. Try other flossing options
If you find using floss too difficult, look for other alternatives. Some tools that make it easier to remove dental plaque include:
- Floss holder (dental floss): This product is shaped like the letter Y or like a tiny saw that holds a piece of dental floss in the middle. You just need to grab the handle and floss the teeth.
- Superfloss: This type of floss comes in pre-cut segments. Each segment is divided into three parts: a stiff end makes it easy to slide through the gap between two teeth or through the braces to clean the plaque; a fuzzy tufted segment thread helps get plaque and leftovers; the regular segment is used for the most effective cleaning.
- Floss threader: makes it easier for you to clean around dental work.
- Water flosser: This device will spray small jets of water to help remove food scraps from your teeth.
Is Bleeding Gums When Flossing Dangerous?
When first flossing, the gums may hurt, bleed and you could feel mild pain. This is quite normal and you should continue to floss following the instructions. The gums will become healthier and will no longer bleed.
However, if the gums cannot stop bleeding after a few days of flossing, you should see a dentist immediately. They will check the condition of the gum and review on how you use your floss.
Plackers orthopick
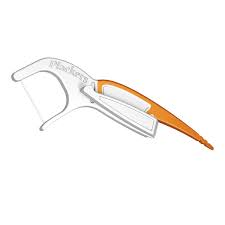
SAN DIEGO, CA, May 03, 2011 /24-7PressRelease/ — Plackers, makers of the first disposable dental flosser, expands its family-friendly line of oral healthcare products with Plackers OrthoPick, a dental flosser designed to make flossing easier and more convenient for millions with orthodontics such as braces, bridges and other dental appliances that make flossing difficult. To help these individuals more easily maintain their daily dental hygiene routine, Plackers is giving away free OrthoPick flosser samples to the first 10,000 people who sign up on its website at http://www.plackers.com/FreeOrthoPick.
Plackers OrthoPick is designed specifically to meet the needs of those with orthodontics such as braces, bridges, permanent retainers and other dental appliances. The unique flosser design has a patented, thin flosser arm that fits easily between teeth and brace wire, offering an easier and more convenient alternative than floss threaders and other similar products that may be more time consuming. In addition, Plackers OrthoPick features an adjustable floss head to help users easily reach back teeth, a soft flexible pick to remove trapped food debris and a comfort grip that is easy to hold.
“Flossing regularly is one of the best ways to prevent chronic diseases such as tooth decay and gum disease – particularly while you’re investing in orthodontic treatments, ” said dentist and Associate Director, External Relations for Oral Health America (OHA) Anthony Stefanou, DMD. “Products like Plackers OrthoPick make it easier for those with braces, bridges and dental appliances to maintain regular flossing routines and help ensure a healthy mouth”
Plackers OrthoPick is the latest addition to the company’s complete flosser line that meets a variety of dental hygiene needs for the whole family.
“Maintaining one’s daily dental hygiene routine can be challenging for individuals with braces,” said Plackers’ Director of Marketing Tom Barman. “Plackers OrthoPick is designed to make flossing with braces and other dental appliances much easier, allowing individuals to help keep their teeth and gums healthy while undergoing orthodontic treatment.”
Those interested can sign up to receive one of the 10,000 free samples on Plackers’ website at http://www.plackers.com/FreeOrthoPick.
Plackers OrthoPick flossers are currently available at select retailers nationwide, or online at www.plackers.com.
About Plackers
Plackers, a leading brand of consumer oral care products, is a pioneer in dental flossers and other consumer oral care products. Having patented the first disposable dental flosser, Plackers is committed to developing high quality, affordable oral care products with innovative features that include a comprehensive line of dental flossers, dental accessories, and dental night guards including the Grind No More Dental Night Protector. Plackers holds over 20 patents and is sold in major retailers worldwide. For more information, visit http://www.plackers.com.
Best floss for braces

Flossing is an essential step in oral hygiene that most people overlook. In addition, it is crucial to maintain excellent oral hygiene while wearing braces to avoid developing white spots, cavities, and gum disease. It can be detrimental to your treatment if you do not adhere to proper oral hygiene, and in severe cases, your braces may need to be taken off sooner than you expected.
WHY IS FLOSSING IMPORTANT, ESPECIALLY WHEN YOU HAVE BRACES?
Braces create many hard-to-reach areas that are difficult to clean with dental floss alone. Food can get trapped between your teeth and under your braces, leading to plaque buildup and tooth decay. Another important reason for flossing is to remove food particles that become stuck in the brackets of your braces. This helps prevent cavities and dental diseases such as gingivitis. Gingivitis causes inflammation of the gums and leads to redness, swelling, bleeding during brushing or flossing, bad breath (halitosis), pain when chewing certain foods, discomfort when wearing dental appliances like orthodontic bands or bridges, etc.
RECOMMENDED TYPES OF DENTAL FLOSS FOR BRACES
#1: WAXED FLOSS
Waxed floss is made of thin filaments of plastic or Teflon coated in wax. The wax makes it easy to slip the floss between your teeth and glide against the surfaces you’re trying to clean. Waxed dental floss is recommended for those with braces, as it tends to slide better between closely-spaced teeth. Like dental super floss, you can use it around dental appliances for added cleaning ability.
#2: SUPER FLOSS
Super floss is a dental tape pre-threaded on a plastic, disposable wand with a dental tape-like tip on one end. It can be threaded along the inside of your teeth and around metal appliances such as braces or permanent retainers to aid in cleaning hard-to-reach places.
#3: FLOSS THREADER
A floss threader is made of two small loops attached to either end of a thin wire with a handle at the end. They allow you to floss between very tightly spaced teeth by threading dental floss through them.
#4: ORTHODONTIC FLOSSER
An orthodontic flosser looks like dental super floss with a handle. The handle allows you to place the dental floss against the wire of your dental appliance so that it won’t slip off while you are trying to clean your teeth.
#5: WATERPIK
A Waterpik is a dental appliance that shoots a pressurized jet of water between your teeth and under dental appliances. This helps remove food particles and dental plaque buildup, thus reducing the risk of dental disease such as gingivitis. In addition, some Waterpiks have attachments that move side to side or up and down along the wire of dental appliances for a more thorough dental cleaning.
To determine the best dental floss for braces, you need to consider how much space there is between your teeth and whether or not you wear dental appliances like orthodontic bands or retainers.
STEP-BY-STEP INSTRUCTIONS FOR FLOSSING WITH BRACES
With braces, flossing can be a little tricky and time-consuming at first, but the more you do it, the more efficient you will become!
Step One: Wrap dental floss around your middle fingers, leaving two inches between them. Use your thumbs and forefingers to guide the dental floss between your teeth.
Step Two: Gently slide dental floss up and down against one side of each tooth in a sawing motion until you reach the gum line. Do not snap the dental floss into place or force it in a back-and-forth motion along the teeth’ surfaces because this could damage the surface of your dental enamel.
Step Three: Repeat steps 1 & 2 on all sides of every tooth until you have flossed every space in your mouth that is visible with braces or dental appliances. If an area is difficult to reach with dental floss, you can opt for dental super floss or dental floss threaders.
Step Four: When finished with your dental flossing session, rinse the excess dental floss out in warm water and dispose of it properly in a waste receptacle.
Along with flossing, we recommend using an electronic toothbrush and visiting your dentist at least every six months for a checkup and cleaning.