Cutting cake is a delicate art. You want to make sure you get a clean, even slice that’s not too thin and not too thick. But there are so many ways to go about this! What’s the best method?
You’ve probably heard of using dental floss for this task. But how does it work? And why should you use dental floss instead of a knife or saw? We’re here to tell you everything you need to know about cutting cake with dental floss, including how to do it yourself and some tips for making sure your slices come out looking as good as possible.
You may find it hard to access the right information on the internet, so we are here to help you in the following article, providing the best and updated information on how to cut cake without it crumbling and how to flatten cake top
How To Use Dental Floss To Cut Cake
It might live in the bathroom and not the kitchen, but dental floss can be a helpful tool for cutting sticky and otherwise difficult to slice ingredients. Don’t have floss around? Fishing wire works just as well! Try these three sneaky ways to use floss and you’ll end up buying an extra container to keep in your silverware drawer.
1. Cheesecake
Slicing this dessert with a knife is a nightmare: A thick cheesecake sticks to the knife, so you end up dragging it through the rest of the cake. The result is a massive mess. Instead, pull out a strip of floss that is larger than the span of the entire cake and start by running the floss right through the cake, cutting it in half. From there, cut the remaining halves into as many perfectly sized and easy-to-slice pieces as you need. Wipe the floss clean before you make each slice.
MORE FROM DELISH
2. Birthday cake
So much more of a pain than it should be: You don’t want the individual pieces to crumble, but you also want them to be small enough so everyone gets a piece. The brilliant thing about floss: It allows you to cut cleanly and keep any design on top in tact.
ADVERTISEMENT – CONTINUE READING BELOW
This content is imported from YouTube. You may be able to find the same content in another format, or you may be able to find more information, at their web site.
3. Layer cake
Take a just-baked, cooled cake and create perfectly straight layers with a long piece of floss. Just hold the floss cross-wise and pull the string across itself: You don’t have to spin the cake as you cut, or worry that one side will be higher than the other. The floss cuts cleanly and quickly.
4. Goat cheese
Soft cheeses are often hard to cut into clean individual rounds or slices (without smashing your log into an unrecognizable mass). Just use a piece of floss to create your neat slices, and you won’t have any dirty utensils to deal with afterward.
This content is imported from YouTube. You may be able to find the same content in another format, or you may be able to find more information, at their web site.
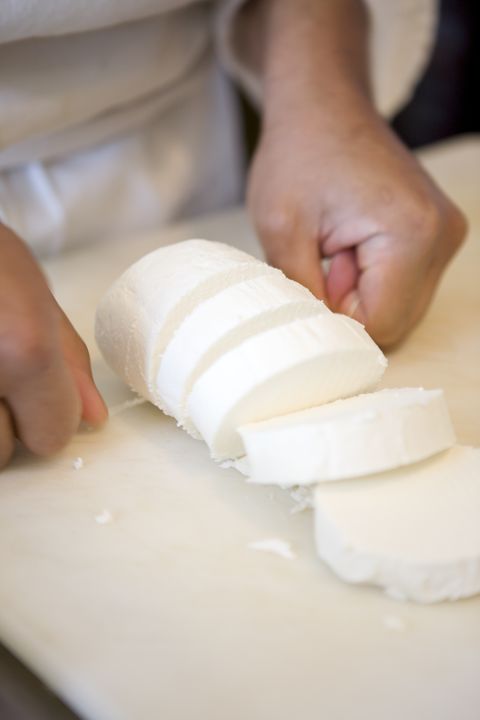
5. Fresh mozzarella
There’s literally nothing better than a ball of fresh mozz, but getting those beautiful slices you see in restaurants is next to impossible. Floss cuts easy through without turning the ball into a stringy mess.
6. Cinnamon bun dough
Once you’ve turned your dough into a neat roll, it’s hard to turn it into individual buns and keep that beautiful round shape. Drag a small piece of floss under the log of dough, and bring the ends of the floss up to cross the thread at the top. Keep pulling the floss so that it crosses through the dough, cutting your perfect slices.
7. Cookie logs
Need to cut sticky cookie dough into ready-to-bake, even pieces? Sugar, chocolate chip, and even pastry dough can all be cut using a regular-sized piece of floss. And this way you won’t have to wipe down your knife in between slices!
How To Cut Cake Without It Crumbling
Your ally is hot water.
If you have time to chill your cake before slicing, running your knife under hot water beforehand will make slicing even simpler. Make sure to completely dry the knife before using it, and cut your slices while it’s still warm to the touch.
How To Flatten Cake Top
I always level each cake before building a layer cake. This is due to the fact that most cakes will somewhat dome in the oven, and stacking the layers only makes this effect worse, resulting in a cake that resembles the sloppy pile of mattresses from “The Princess and the Pea.” I still advise cutting the tops of cakes even when you have a fantastic recipe and excellent pans that will result in pretty flat cakes.
Cake Leveling Techniques: Not Only For Stability
This is more than just a recovering pastry chef’s compulsive habit; by removing the comparatively thick and dry top crust, I am placing the cake’s soft interior in contact with the filling so that it can easily absorb moisture and flavor. It will not only increase the flavor and longevity of the cake but also yield a ton of delicious scraps that are perfect for tasting the filling or icing and adjusting their flavors before assembling the cake. I tell myself that while I eat a bite after another of the food.
Configuration and Tool Choice
A completely cool cake is best for leveling; a warm, delicate cake would shatter into a mountain of crumbs when cut. It also depends on having the appropriate equipment. A 9- or 10-inch serrated knife is preferable to a pointless, one-task cake cutter.
Daniel suggested the Tojiro Bread Slicer, which is long enough to easily cut through an eight-inch cake (see out his review of the finest serrated knives here). You would do better with the somewhat longer version from Dexter-Russell if you want nine-inch cakes. Instead, simply grab your preferred bread knife; odds are good that it’s long and sharp enough to handle a basic cake.
Making the Cut Gradually
Place the blade where the dome of the cake starts to rise up to easily level the cake. Cut the cake with a moderate horizontal sawing motion approximately one inch deep. Then, rotate the cake by about 45 degrees and repeat.
Continue flipping and making small cuts until a loose flap is present all the way around the cake. Just cut down the centre starting there. There is no need to position toothpicks precisely. Until assembly time, keep the cake top in place to minimize moisture loss, or alternatively lay the scraps away and wrap the cake in some plastic wrap. Your favorite layer cake will soon look and taste its best once you have finished that little task.