How To Use Dental Floss To Cut Cinnamon Rolls ? Most people have a go-to dish that they grew up eating and look forward to every time they get together with friends or family. If you’re looking for something classic, cinnamon rolls are a great option. They’re soft and fluffy, with just the right amount of sweetness. They make an excellent treat for breakfast or brunch—or even dessert!
But what if you want to make them at home? A lot of people don’t know how to cut cinnamon rolls once they’re baked, because they’re not like regular breads. You can’t just slice through them like you would bread; you need to use dental floss!
The cinnamon roll is a delicious breakfast treat that isn’t always easy to eat when you’re on the go. But did you know that you can use dental floss to cut your cinnamon rolls into perfect slices? Check out this blog post for details on how you can use dental floss to make cutting cinnamon rolls easier. Read on to learn more on how to cut cinnamon flavor and how to cut cinnamon sticks.

How To Use Dental Floss To Cut Cinnamon Rolls
Cinnamon rolls are a fantastic project for any baker (and any enthusiastic eater!). Of all the yeasted doughs to bake, cinnamon rolls are some of the simplest and most user-friendly. And with one little secret weapon — borrowed from your bathroom cabinet — you can make more precise, uniform rolls with ease.
Most cinnamon roll doughs, like our popular Cinna-Buns and Soft Cinnamon Rolls, are enriched with butter and eggs, like a brioche. This dough has four great selling points.
First, it’s very pliable and easy to roll out; it doesn’t snap back like pizza or cracker dough can.
Second, it’s much more tender than many sandwich-type loaves, so you don’t need as much elbow grease to knead it.
Third, it’s not sticky or overly buttery, so you don’t even need extra flour to roll it out.
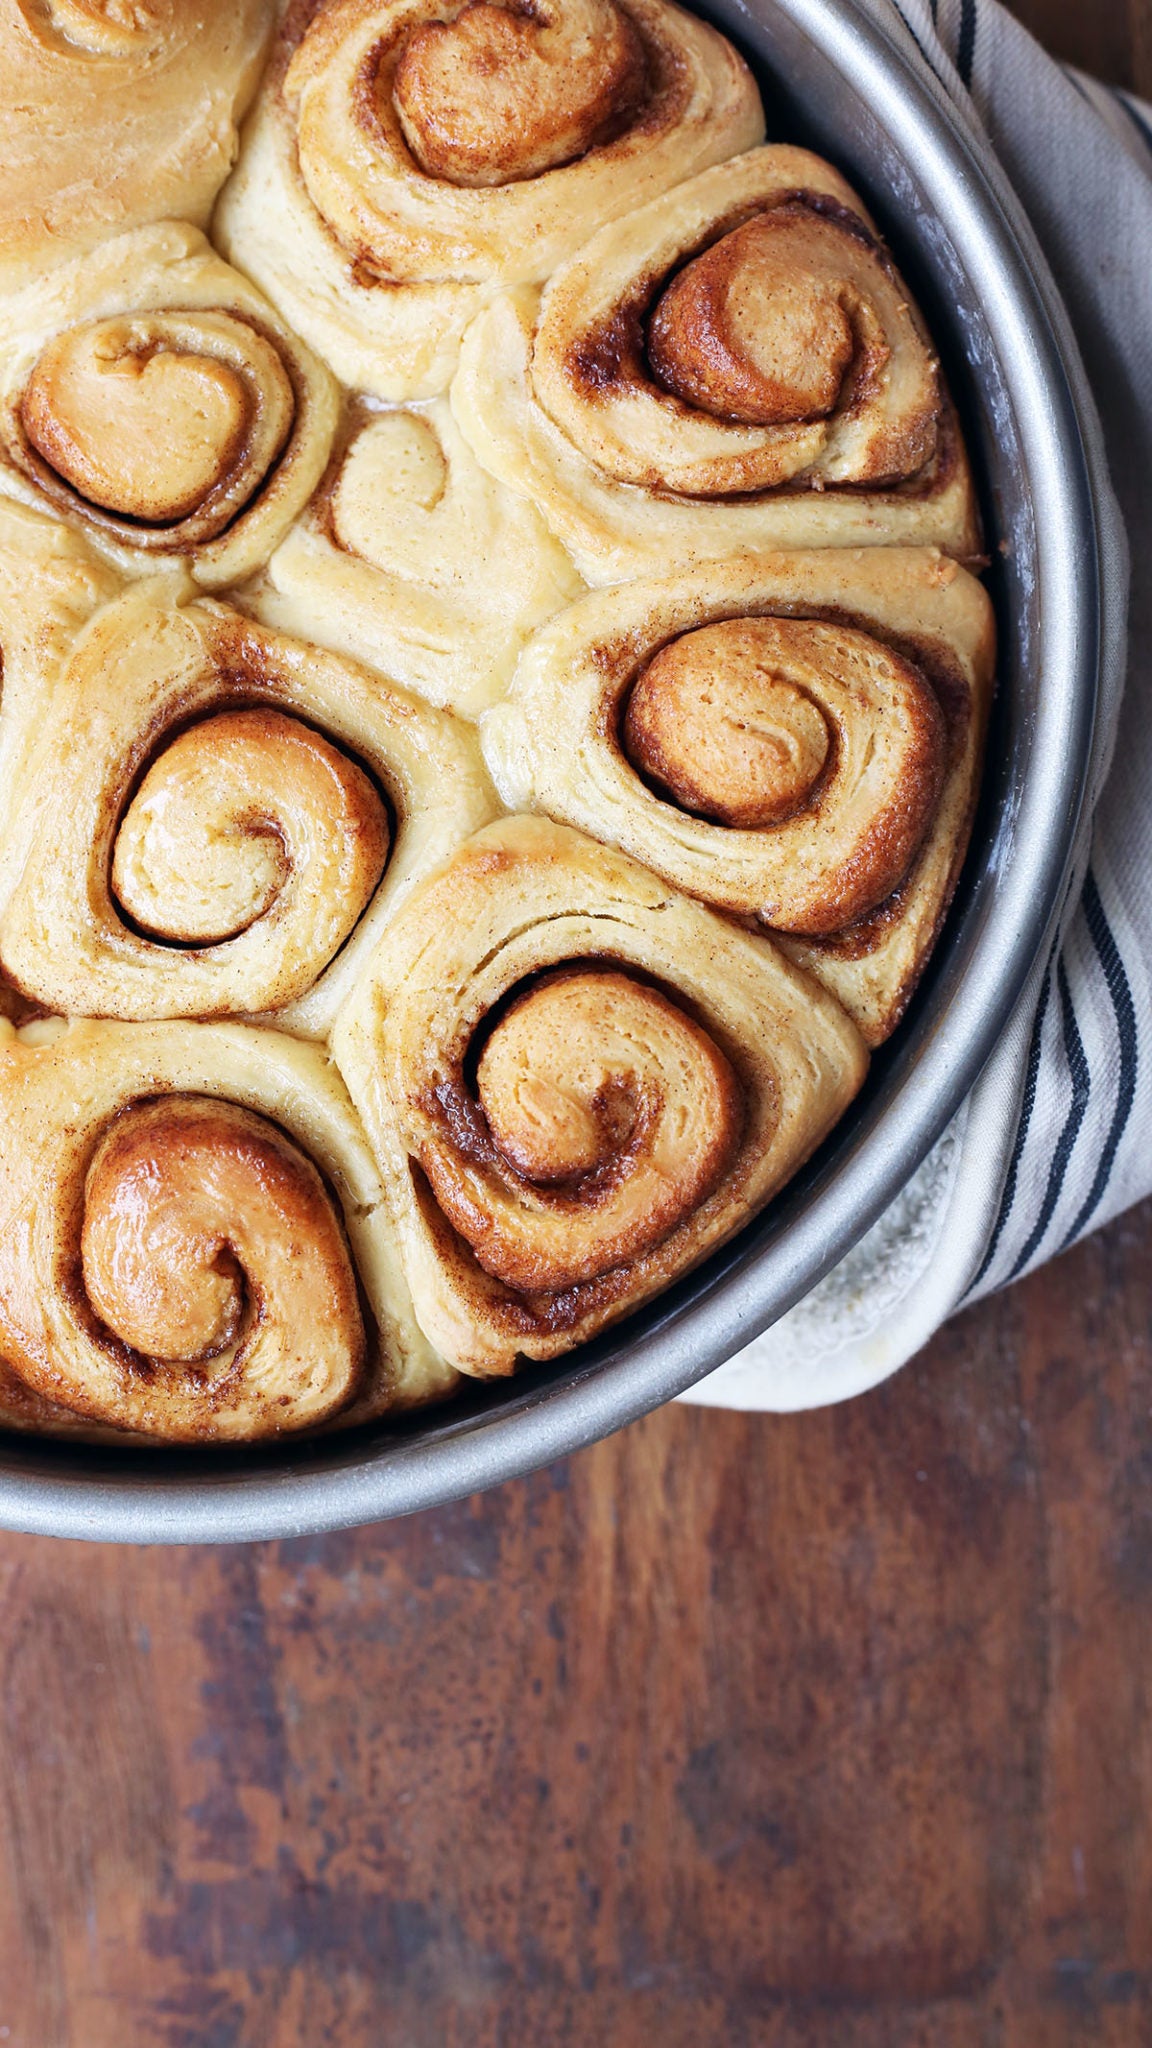
And of course, the most important quality of all: it’s absolutely delicious! My favorite recipe calls for nothing more than cinnamon sugar and butter in the filling. As it bakes, the filling melts into a spiced, caramelized swirl of sugar inside each tender roll.
A smart tip
We have all sorts of resources (from turning them gluten-free to making them softer) to teach you more about rolls, but today we’re going to talk about one excellent tool for making rolls: dental floss.
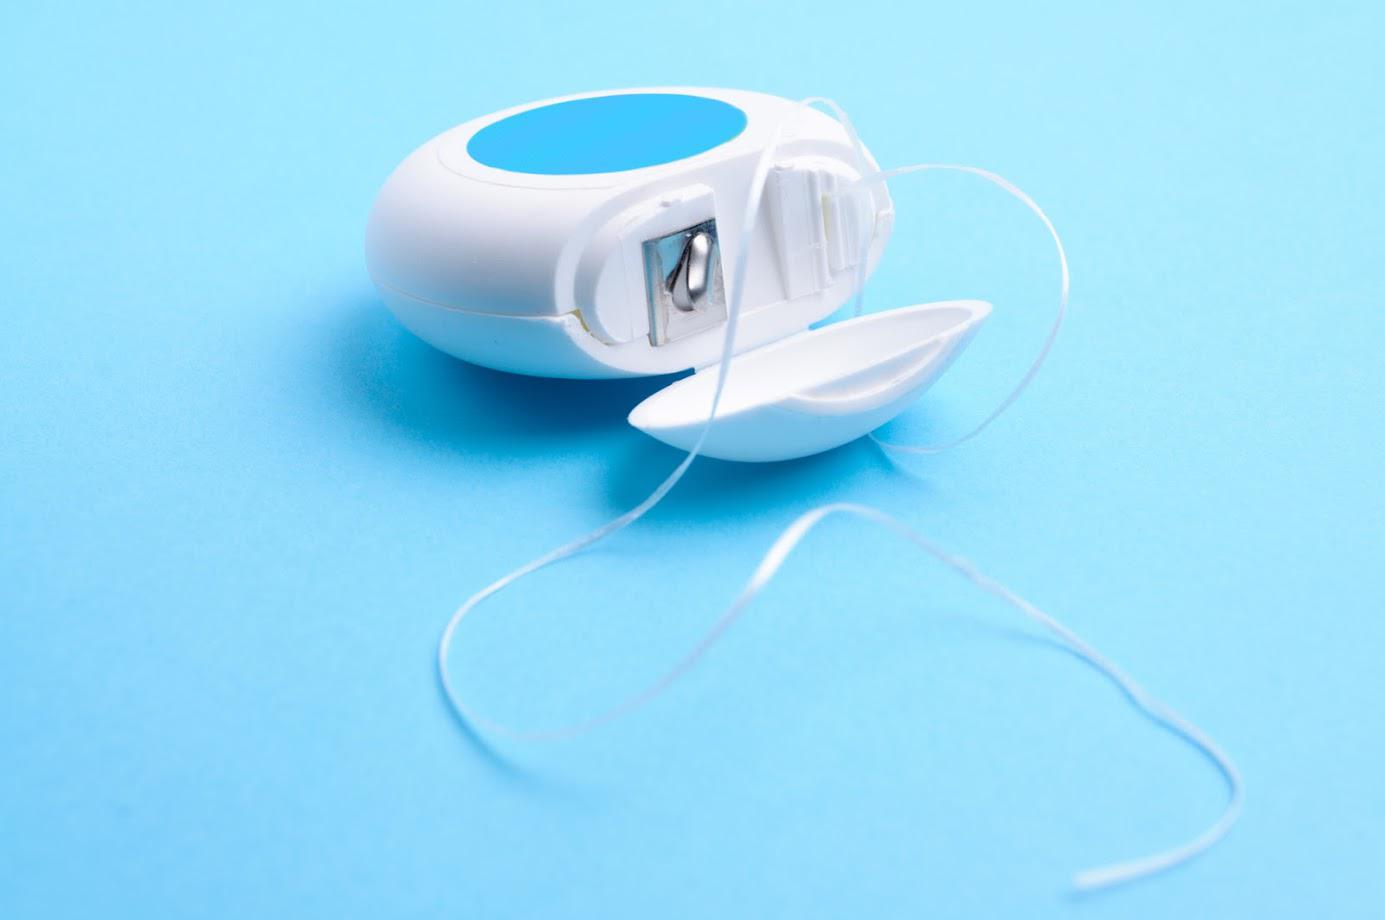
Dental floss is the best and neatest way to slice your rolls. It’s better than a sharp knife, a serrated knife, or any other tool we’ve tried. Dental floss slides cleanly through the dough, cutting it into slices without smooshing and tearing. If you use a knife, you have to press down on the dough, which alters the shape. Dental floss keeps the shape intact.
This is a trick I swear by. I tell every baker and friend about it; every person who tries it has raved over the difference one little trick can make. When your dentist says “floss daily,” they probably aren’t referring to baking cinnamon rolls. But, I’ll take it as a directive to do exactly that!
Be sure to use unflavored floss! If mint-flavored waxed floss is all you have, go ahead and use it, but plain is ideal to avoid any mint taste on your dough.
Slicing cinnamon rolls with floss
Here’s how to do it: First, you’ll make your dough and let it rise for almost two hours. It should become quite puffy, but may not double in size.
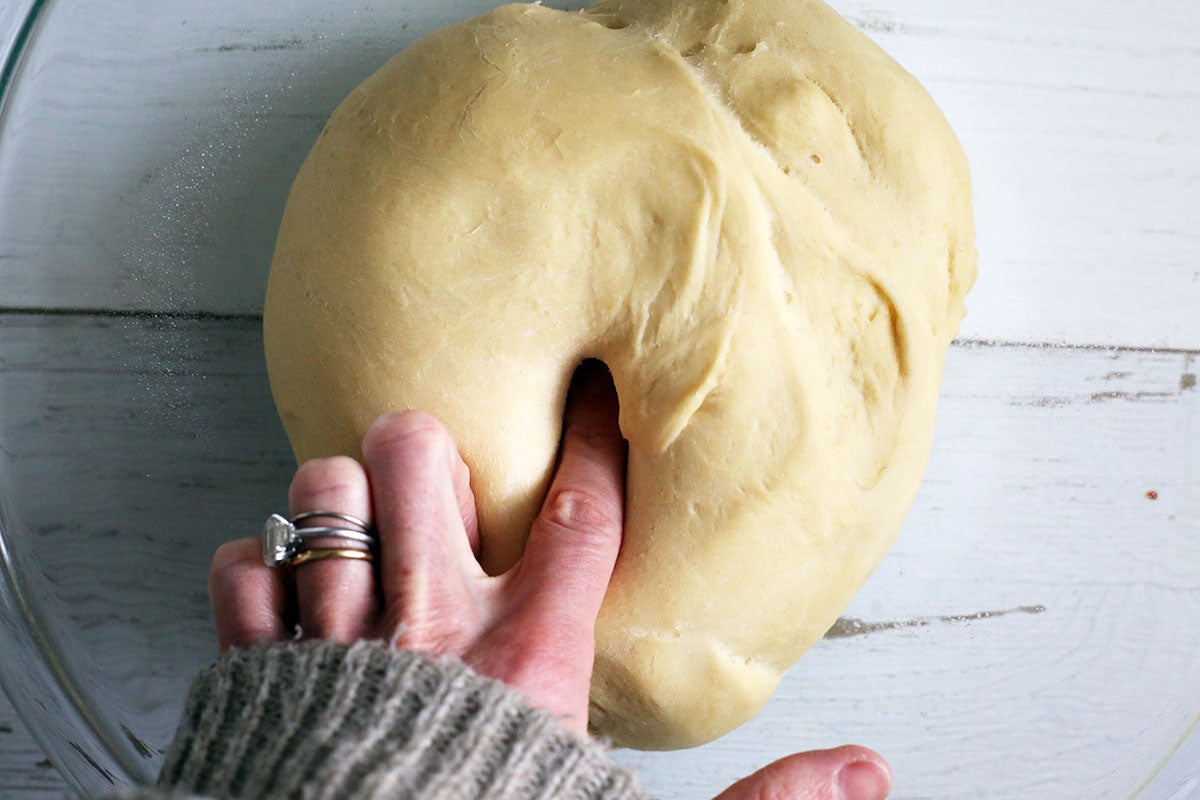
You can check to see if it’s ready by pressing a finger into the dough. When it’s risen properly, your fingerprint should remain in the dough but spring back slightly.
Press the dough out into a rectangle. A rolling pin is helpful here, but the dough is soft enough that you don’t need it. I always roll my own out onto a rolling mat. It keeps counters tidy and clean-up to a minimum!
Spread the butter across the dough, then sprinkle it with cinnamon sugar.
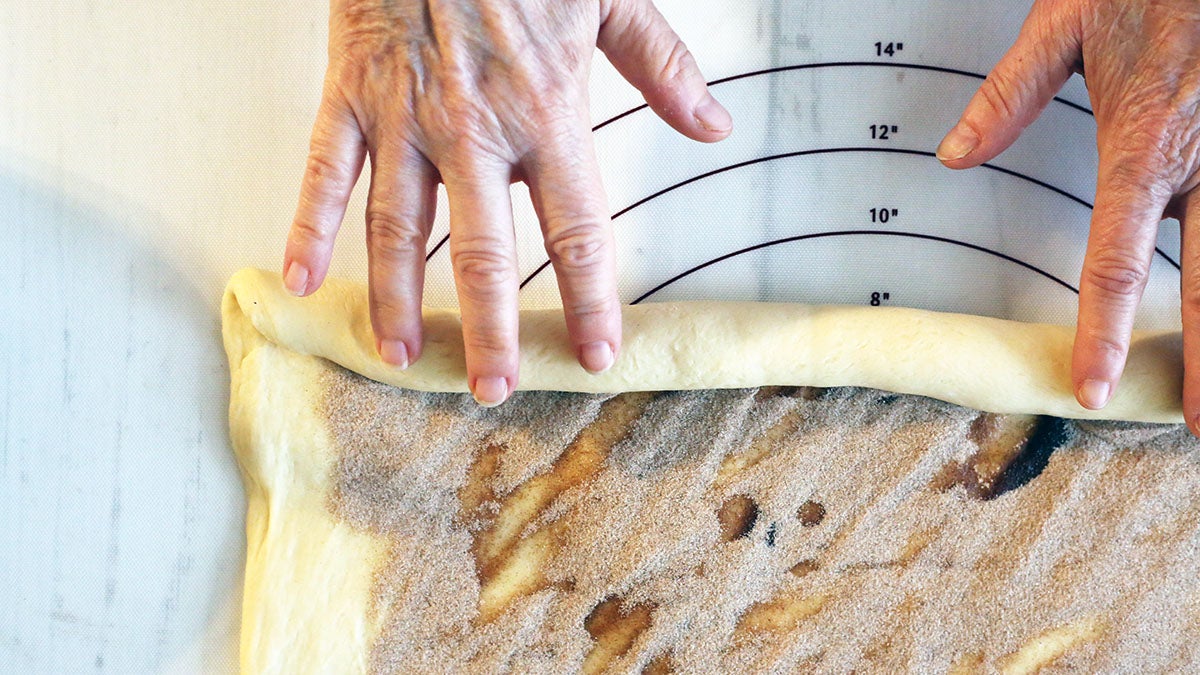
Gently roll it up starting from the long edge closest to you.

Pinch the seam closed tightly.
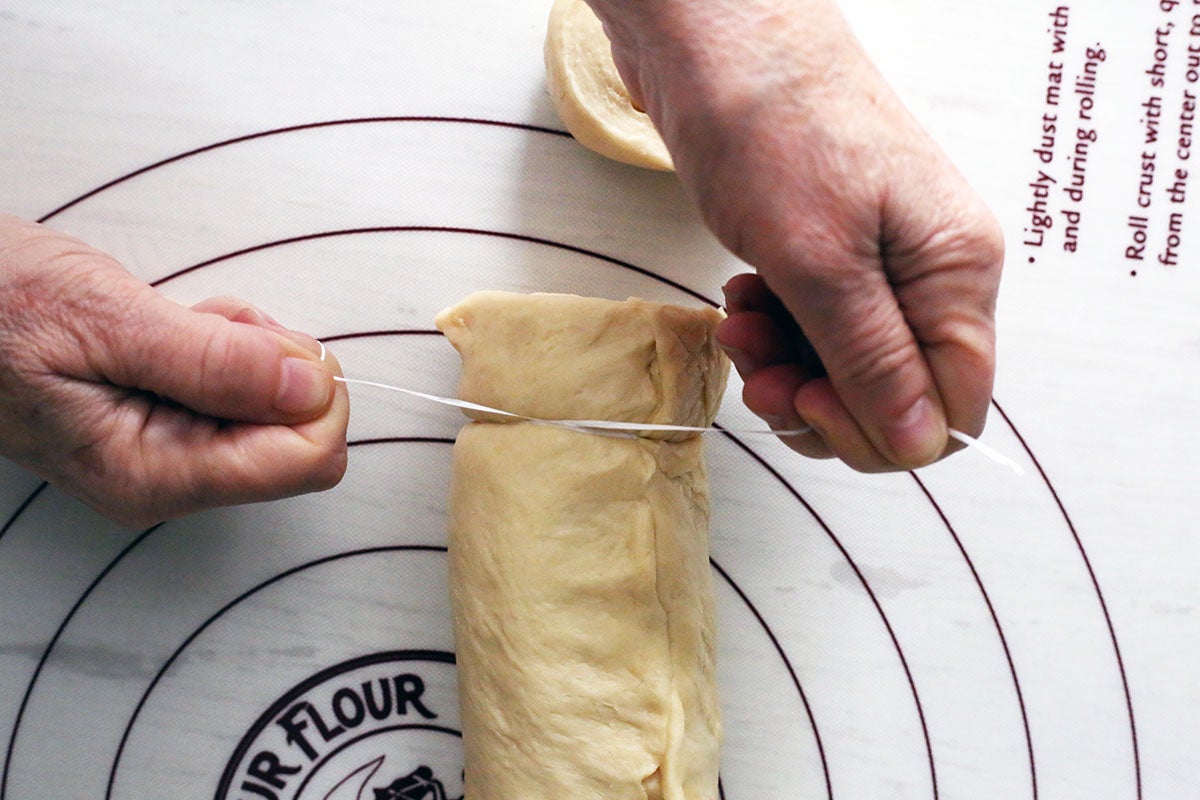
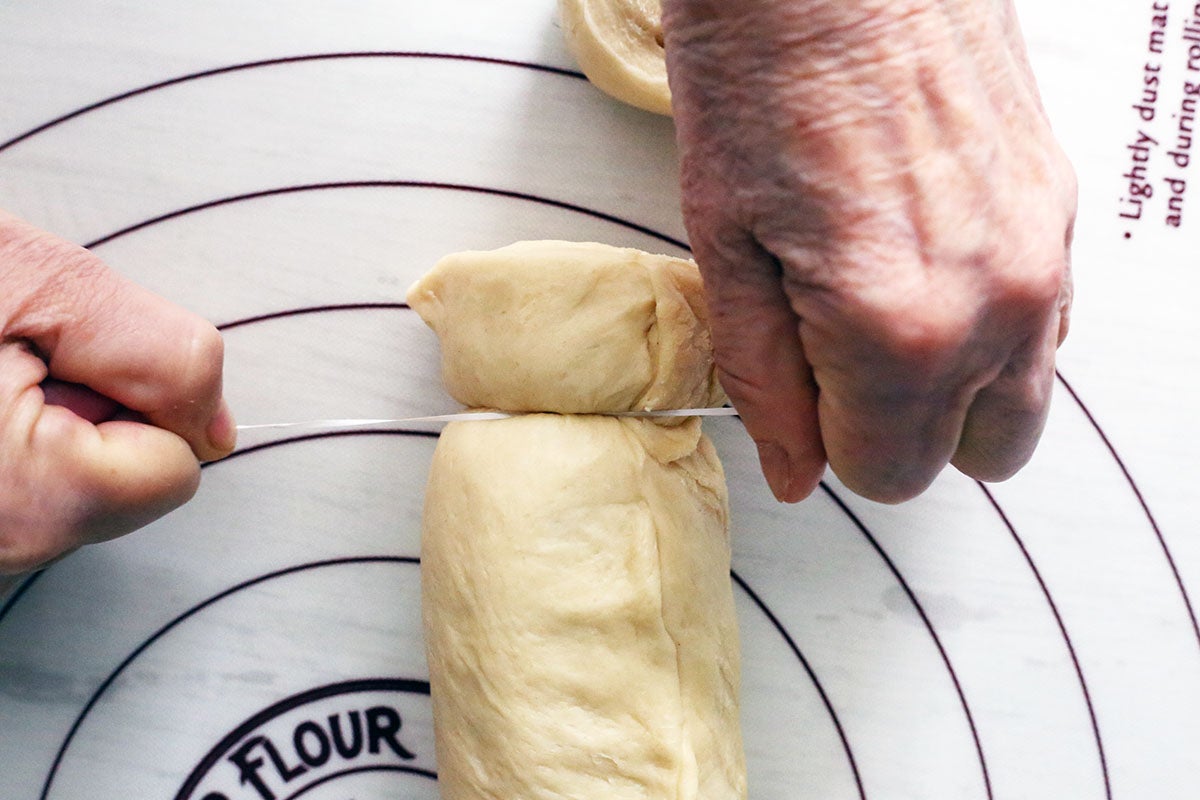
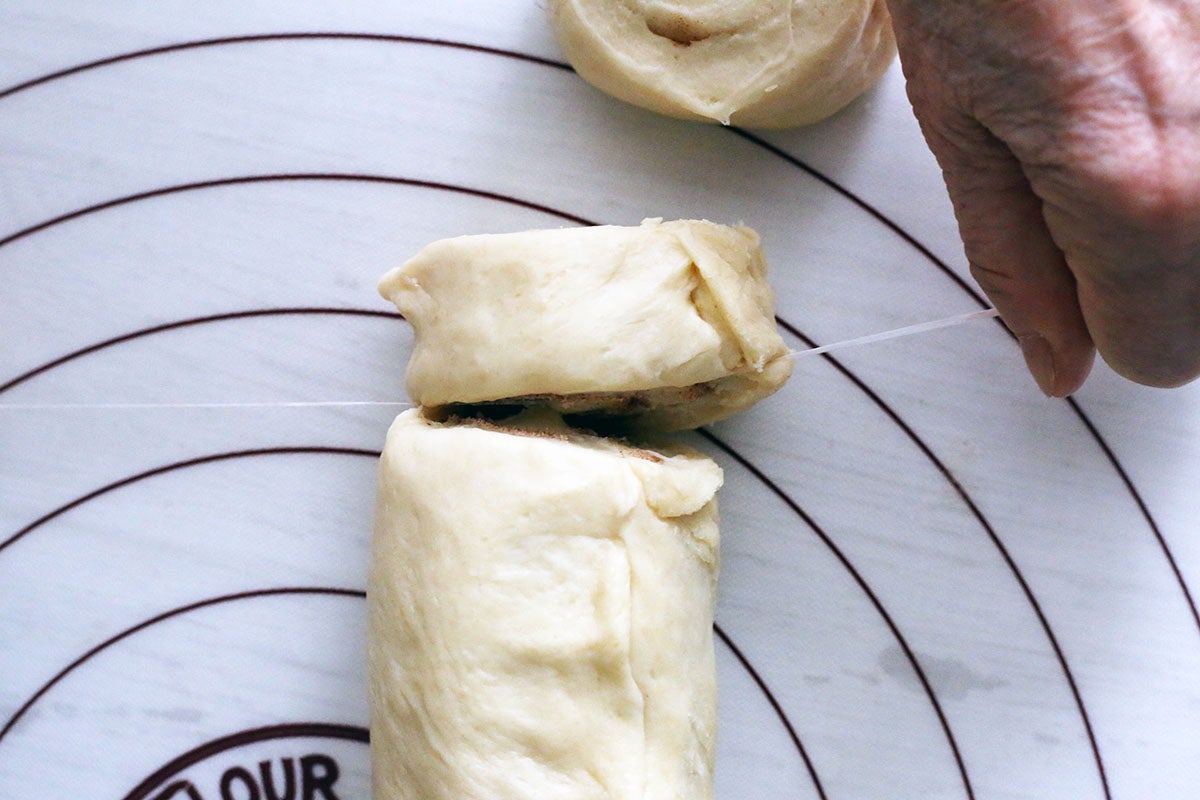
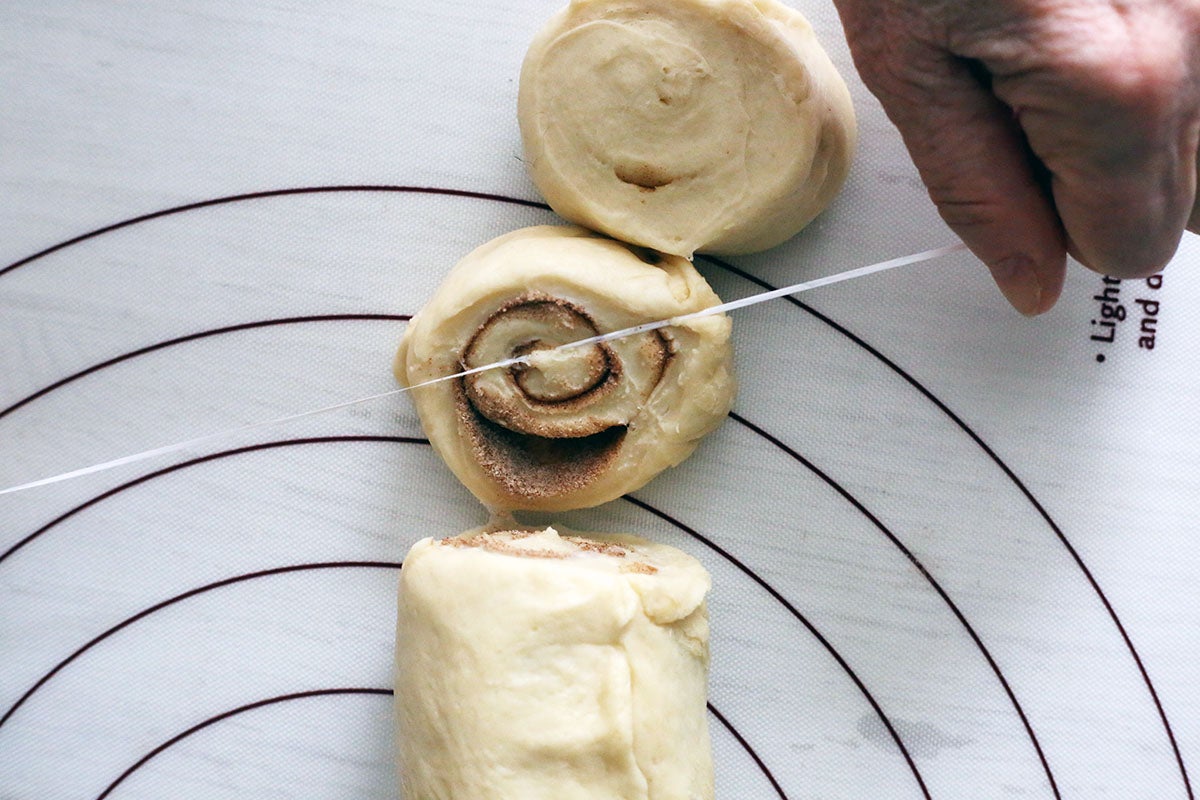
Now, it’s time to floss! Slide a long piece of dental floss under the dough. Wrap it around the top. Pull tightly in opposite directions to pull the floss through the roll. Repeat, slicing at about 2″ intervals.
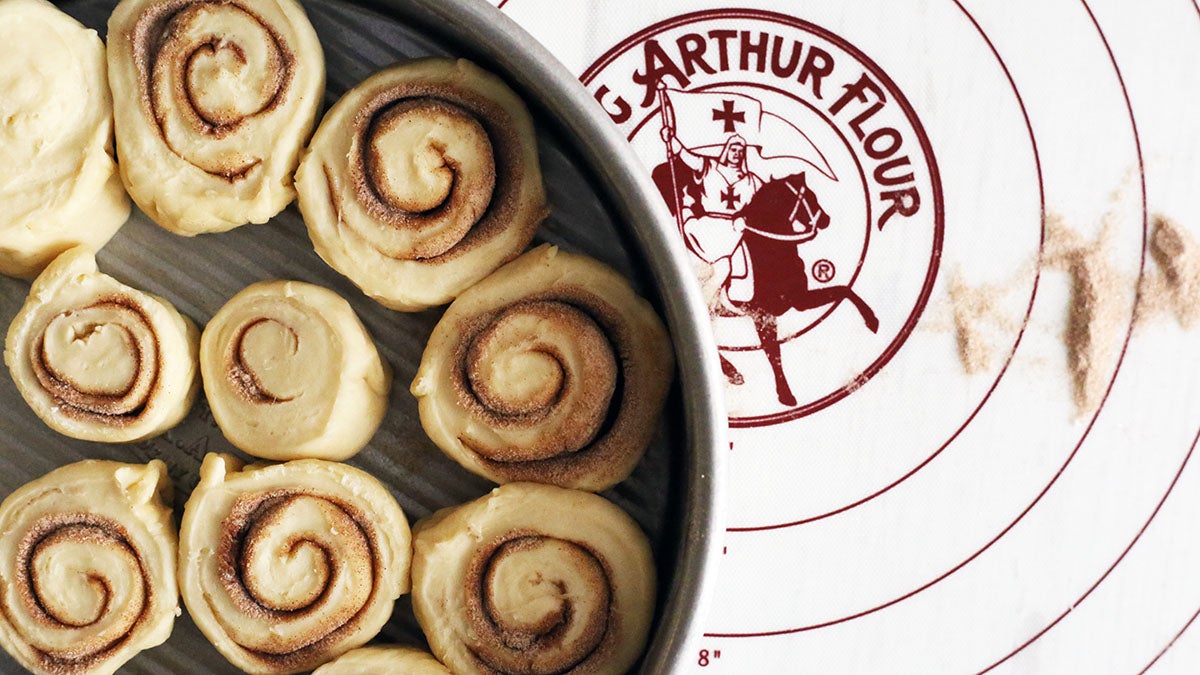
Place your rolls in a round cake pan, cover with plastic wrap or a damp tea towel, and let them rise until noticeably puffy. This should take about 45 minutes.
While the rolls rise, preheat your oven. Check your recipe; some will bake lower for longer (350°F for about 25 minutes) and some hotter for less time (400°F for about 15 minutes). They’re ready when they’re a dark golden brown color on the top.
Remove them from the oven. If you’re frosting them, let them cool fully before topping them. If you’re not topping them, brush them with melted butter while still warm.
More inspiration
Our Cinna-Buns recipe calls for a traditional filling of butter and cinnamon sugar. But you can switch it up. Change the spices (cardamom and nutmeg are excellent), add some citrus zest, or sprinkle nuts and chopped chocolate over the dough. Make babka-style rolls by spreading the dough with chocolate hazelnut spread.
Try the Cinna-Buns recipe I used here, or start with one of our top-rated picks, like these Soft Cinnamon Rolls or Favorite Sticky Buns. Grab your floss and get baking!
How To Cut Cinnamon Sticks
Pick up one cinnamon stick and place it on the cutting board. Score all the way around the stick circumference at the pencil mark with a serrated knife, turning the cinnamon stick on the cutting board as you go.
When cinnamon is too strong, you can add other spices to balance the flavor. Go carefully and add a little bit at a time, taste testing as you go, or you may completely overpower the dish. If the cinnamon flavor is too sweet, add a contrasting strong spice, such as chili powder, lemon pepper, garlic powder or paprika. If the cinnamon is on the spicy side, add white or brown sugar and a sweet spice, such as nutmeg. A little salt may also help, but use it sparingly, particularly if you’re watching your sodium intake.
Liquids
Adding extra liquid to your stew dilutes the flavor of too much cinnamon. Use a mild broth, such as vegetable stock, and add a cup at a time. The acidity of tomato juice can also help even out the flavor of your stew. A strongly spiced stew can be toned down with the addition of a dairy product, such as milk or cream. Add a little hot broth to your dairy addition before mixing it into the stew to prevent curdling, and use it in moderation because of the fat content. Some stews benefit from the addition of a sour liquid to balance sweetness. Use lemon juice or red wine vinegar in small amounts.
However, metal braces are the right decision for some people, like younger children who may have trouble consistently wearing removable aligners. If you or your child has metal braces, you need to be sure you’re using the best flossing tools for braces to protect the health of your gums and teeth while they’re being straightened.
Flossing is a particular challenge for people with braces. The metal brackets and wires can get in the way of the floss, preventing you from easily cleaning in between teeth. If you want your teeth to be not only straight, but healthy and stain-free, you need to be sure to floss daily as well as brush thoroughly.
The 4 Best Flossing Tools for Braces:
#4 – Typical Floss with Threaders
You can still use regular floss with your braces, but a little extra help from a floss threader will make things much easier. You simply thread the floss through the threader, thread the floss around the wire and between teeth, floss, and repeat the process between each subsequent tooth. This process may be a little time-consuming, but it’s cheap and effective. There are a number of great brands of floss threaders available, including Dentek, Plackers, GUM, and Crest.
#3 – Oral-B Super Floss
Especially designed for use with braces, Oral-B Super Floss is a step up from using a floss threader. Super Floss is made from a piece of regular floss. At one end, there is a stiff piece of plastic, no bigger than the floss, but rigid enough to insert between your teeth. This plastic end allows you to quickly and easily insert the floss between teeth around braces wire, floss, and then move on to the next area. This product also includes a small area of “spongy” floss between the plastic threader and the regular floss, which allows you to clean further down under the gum line and around brackets and wires to remove more plaque and food particles before you brush.
#2 – AirFloss
The Sonicare AirFloss is a great choice for kids (or adults!) who have trouble taking the time to floss. In about 60 seconds, it can clean your entire mouth with bursts of air, and there’s no string to get caught in your braces. It’s not as inexpensive as floss threaders or Super Floss, but if you dread flossing, it will help you spend less time in front of the bathroom mirror without sacrificing your oral health.
#1 – Waterpik Water Flosser
A water flossing system like Waterpik’s Water Flosser is also ideal for braces. These systems may have a higher up-front cost than plain floss, but they’re much more comfortable and effective than traditional floss, removing as much as 99.9% of plaque when used correctly. Dr. Mullins thinks that water flossers are actually the best flossing tools for braces, because they make it so easy and comfortable to clean your teeth thoroughly!
No matter which flossing solution you choose, it is imperative to floss regularly to keep your teeth healthy. If you don’t, you may have unsightly stains or even damage when you have your braces removed!
How To Cut Cinnamon Flavor
If the cinnamon flavor is too sweet, add a contrasting strong spice, such as chili powder, lemon pepper, garlic powder or paprika. If the cinnamon is on the spicy side, add white or brown sugar and a sweet spice, such as nutmeg.
Sometimes a quick craft is just the thing to get you in a festive mood. I wanted to add something new to our Christmas tree this year, and stumbled across a few different ideas for using cinnamon sticks (of which I have a lot) to make Christmas ornaments. While my first few attempts resulted in utter failure (apparently I am not particularly good at cutting cinnamon sticks without breaking them… nor at making a star that looks star-shaped), I finally found a triangle ornament by Tag & Tibby that I thought was simple and charming.
As soon as I glued my first cinnamon sticks into the triangle shape… my eye fell onto the remnants of my failed attempts to cut cinnamon sticks into tiers, and INSPIRATION struck! All my triangle needed was a “trunk”, and it was a perfect Christmas tree.

I felt like a kid on Christmas morning (and may have even done a little jig in my kitchen) at how adorable these would be. Immediately I ran to the garage for some wire cutters… snipped off the tips of a few garland ends (no one will ever notice!) and ran downstairs to raid my button and ribbon boxes. Five minutes later, I was hanging my newest ornament on our tree. After a moment to admire it… I went to make more!
Seriously simple, cute and FAST, these would make lovely gift-toppers too!
(Don’t have time right now? Be sure to Pin for later!)
Let’s make some together!
First, gather your materials (getting everything together before you start saves running around your house like I did).
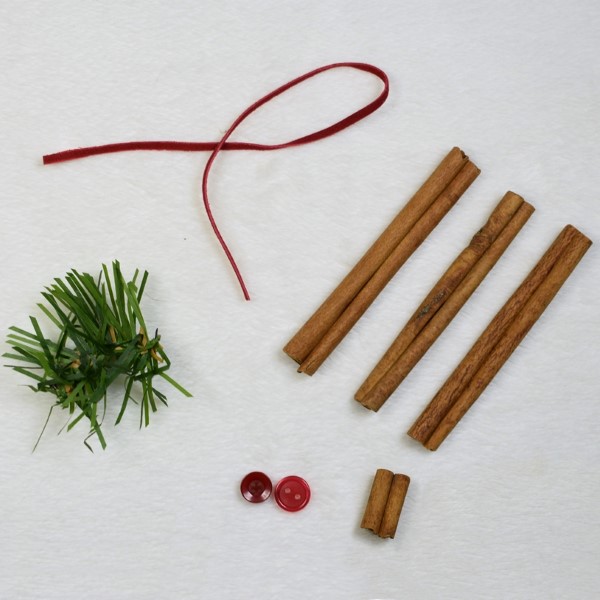
You will need:
– 4 cinnamon sticks (at least two of them should be the same length; the one along the bottom can be slightly shorter if you wish). You will cut just a small piece from one of these sticks so, really you only need a small piece for the fourth one, not the whole stick… but chances are you won’t already have a small piece handy.
– a small piece of faux evergreen needles approximately 4cm [1.25″] long (snipped off from a garland or wreath).
– a couple small red buttons.
– length of faux suede cord or 1/8″ wide ribbon, approximately 18cm [7″] long.
– hot glue and glue gun, and a hack saw (for cutting a small piece off one cinnamon stick).
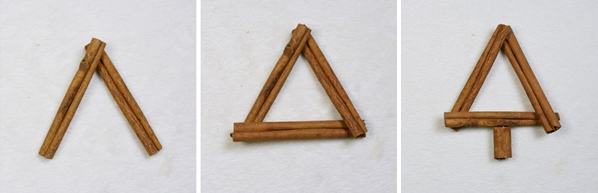
Using hot glue, overlap and stick together three cinnamon sticks in a triangle shape. You may have to play around with the best way to stack the sticks as some of them will be twisted one direction or the other. See what you like best with which way the cinnamon bark is curled. Personally, I liked trying to place them so that each stick was over at one end and under at the other end.
From the remaining cinnamon stick, cut a piece off that is about 2cm [3/4″] long. I found that a hack saw worked best for this. A side benefit if you do this step inside the house is that there will be a lovely aroma of cinnamon as you are sawing away!
Glue this small piece on the bottom of the triangle to create the tree trunk.
Unfortunately, no matter how well you brush, you should always floss at least once a day. Flossing helps remove plaque from between teeth and below the gumline that is difficult to remove with a toothbrush alone. If you do not remove this plaque on a daily basis, then you could develop gum disease or cavities between your teeth.
Read on to learn four tips that make it easier to floss while you wear braces.
1. Use the Right Traditional Flossing Tools
One of the most time-tested and affordable ways to floss your teeth while you wear braces is to use traditional dental floss combined with a special device called a dental floss threader.
Check the label of your floss to ensure that it is waxed and not unwaxed floss. Unwaxed floss can shred when it rubs against braces wires and brackets, while waxed floss tends to glide over them smoothly.
Braces floss threaders are small loops of very stiff floss. They resemble large sewing needles. If you have difficulty maneuvering dental floss underneath your braces’ wires, you might accomplish the task much more easily with the aid of a stiff floss threader.
To use a floss threader, simply connect your floss to the loop, as you would thread a sewing needle, then use the threader to thread the floss under your braces’ wires as you floss instead of attempting to do it with your fingers.
2. Look for Orthodontic Flossers
If you enjoyed the use of floss picks — small pieces of dental floss attached to small plastic handles — before you obtained braces, then you will be happy to hear that there are similar flossing tools made specifically for braces wearers.
Traditional floss picks have wide handles that are impossible to maneuver under braces wires, but orthodontic floss picks are attached to very narrow handles that often slide right under braces’ wires. Many braces wearers not only find these floss picks much easier to use than traditional floss but also find that they make flossing a much quicker task.
3. Try an Interdental Cleaner
If you would like to skip the traditional dental floss altogether, then you may want to try one of the many different interdental cleaners available today.
Some interdental cleaners are short, thin sticks made of a stiff, yet flexible material called polypropylene. You simply glide these short sticks between your teeth to remove tartar and food particles.
Other interdental cleaners, called interdental brushes, consist of thin, flexible wires with short bristles attached to them. You slide these brushes between your teeth and under the gum line to remove plaque. These brushes come in many diameters meant to perform different dental cleaning tasks, so be sure to choose a brush with a very small diameter to avoid damaging your teeth or gums.
4. Consider a Water Flosser
Another way to clean between your teeth and under your gum line when you wear braces is to use a water flosser. Water flossers project thin streams of water on and between your teeth. Water flossers can be used to remove plaque between teeth and under the gum line, just as traditional dental floss does.