How To Use Dental Floss To Remove A Tooth . You’ve tried everything: pulling it out with your fingers, biting down on a paper clip and yanking, even chewing on the end of a pencil and hoping for the best. But nothing seems to work. The solution is simple: dental floss! Dental floss is one of the most overlooked tools in your medicine cabinet, but it can be used for so much more than simply getting food stuck between your teeth. In fact, if you’re having trouble removing a loose tooth, dental floss is exactly what you need!
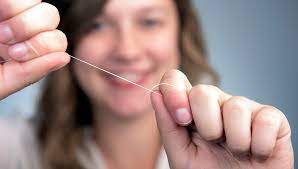
To get started, grab some dental floss and pull off about 15 inches of it. Then wrap this length around your index finger (or whichever finger is smallest) so that there are two separate loops coming out of either side at right angles to each other.
Dental floss is one of the world’s most useful and effective utilities. But not many people know how to use dental floss properly. Therefore, they don’t see any results from flossing. See video with methods to use dental floss to remove a tooth . Read on to learn more on how to floss back teeth and how to use dental floss with braces.
How To Use Dental Floss To Remove A Tooth
How often should you floss your teeth?” is a common question patients ask in the dentist chair. Flossing can be tedious and uncomfortable and many people struggle to floss everyday like their dentist recommends.
“Brushing alone does not remove all plaque. If your teeth are close together, flossing is one of the only ways to get rid of the bacterial plaque that lives between your teeth,” says Deborah Foyle, DDS, MS, MSc, clinical assistant professor and director of pre-doctoral periodontics at the Texas A&M College of Dentistry. “Plaque can cause tooth decay and gum disease if it is not removed.”
How to use dental floss
First, it’s important to know the basics of flossing your teeth. The American Dental Association provides the following tips:
- Break off about 18 inches of floss and wind most of it loosely around one of your middle fingers. Wind the rest around the same finger of the opposite hand. This finger will take up the floss as it is used.
- Hold the floss tightly between your thumbs and forefingers.
- Guide the floss between your teeth using a gentle sawing motion. Never snap the floss into the gums.
- When the floss reaches the gum line, curve it into a C shape against one tooth. Gently slide it into the space between the gum and the tooth.
- Hold the floss tightly against the tooth. Gently rub the side of the tooth, moving the floss away from the gum with up and down motions. Repeat this method on the rest of your teeth.
When should you floss: before or after brushing your teeth?
“You should aim to floss at least once per day,” Foyle said. “Some people floss more often, and some people floss less often. However, if you regularly floss less than once per day then you run the risk of developing periodontal disease—gum disease.”
Gum disease can lead to receding, tender gums and bad breath. Ultimately, these symptoms of gum disease can make it more painful to chew and eventually lead to tooth loss.
Some studies found that flossing before brushing may be the best order for your nightly routine. If you floss before you brush, then you can brush away all the loose plaque.
Which dental floss is the best?
Multifilament floss is the most common type of floss on the market. Typically, multifilament floss is made out of nylon or silk, but most are made from nylon.
Multifilament floss also comes waxed or un-waxed. Wax generally makes gliding the floss between your teeth easier and some say more comfortable.
A downside to multifilament floss is that it may shred or break more easily than monofilament floss. Monofilament floss is newer to the market and made out of plastic or rubber. Since it’s stronger, it doesn’t shred or tear. People generally find monofilament floss easier to use and move between teeth; hence many brands use the word “glide” in the floss name.
Both types come in different thicknesses and flavors, depending upon your needs.
“The type of floss you use is more a matter of preference, but the most important thing is choosing floss you like and using it every day,” Foyle said.
Flossing tools to make it easier
Gripping the floss, while simultaneously attempting to get to those hard-to-reach places, can be difficult for even the most experienced flossers.
Floss holders are small plastic tools that do what the name suggests—hold floss—and they can make your oral routine less of a mouthful. They come in two different shapes: C-shaped and Y-shaped. Besides shape, you also have the choice of floss holders that already have the floss attached. These aids can save you not only time, but also floss.
Other manual options include the classic Stim-U-Dent and soft picks. Stim-U-dents are small pieces of lightweight wood that soften when wet. The soft picks look like tiny Christmas trees. Their shape and bristles are perfect for those with braces or permanent retainers, as they effortlessly go between wire and teeth.
How to floss teeth with braces or with limited motor function
People with braces have to navigate wires making flossing even more difficult. Foyle suggests using interproximal cleaners like Stim-U-Dents, soft picks, floss threaders or water irrigators.
Water irrigators shoot water between teeth and clean out areas where gums pull away from the teeth and form spaces, called pockets or crevices. Plaque often hides in these crevices.
Due to its ease of use, water irrigators are a good option for those who have diminished motor function. That being said, Foyle mentions water irrigators do not remove all plaque and should be used in conjunction with manual flossing.
Why is flossing important?
Flossing controls plaque buildup, and plaque buildup can lead to gum disease. “Flossing is an essential component of good oral health,” Foyle said. “Flossing products are really a matter of personal preference. After all, the best floss is the one that gets used.
How To Use Dental Floss With Braces
Wrap the ends of the floss around your pointer fingers of both hands, but leave a few inches of taut floss between them. Gently slide the floss between each set of teeth using a back-and-forth motion. Floss the sides of each tooth beneath the gum line to remove plaque and food particles.
This is because a simple brushing cannot reach in-between the teeth. Flossing is the only way to remove plaque and bacteria from areas in between your gums and teeth. This is often a challenge for many patients, particularly when it comes to flossing your back teeth. Here are a few tips and tricks from the team at Honest Teeth that will make flossing your molars a bit easier:
Start With The Proper Length Of Dental Floss And Good Technique
Proper flossing technique is critical for cleaning your rear molars. To floss, you’ll want to dispense about 18-24 inches of dental floss from your container. Then, wrap the ends around your index and middle fingers.
Pull the floss between each of your teeth in a “sawing” motion to dislodge debris and clean the surface of the tooth. Need an example? This video from eHowhealth provides a great visual of proper flossing technique.
Use A Longer Piece Of Floss To Reach Your Back Teeth
When it’s time to move onto your rear teeth, it can be helpful to use a slightly longer piece of floss. Unwind the floss from your fingers somewhat, so that you can use the longer length for more maneuverability.
Consider A Floss Pick If You’re Having Trouble With Your Rear Teeth
If you are having trouble flossing your back teeth due to issues with manual dexterity or a strong gag reflex, a floss pick may be a viable alternative to traditional floss.
Floss picks use a hard, plastic head with a piece of floss stretched between its two tips, and they have been proven to be nearly as effective as traditional floss at safeguarding the health of your gums, so they are a viable alternative if you are struggling with proper flossing technique.
A Water Flosser May Also Be A Good Option
Water flossers, such as the widely-known WaterPik, have been proven to be very effective at removing plaque from the teeth. If you are having problems flossing your rear teeth with traditional dental floss or a floss pick, a water flosser may be a good option for you.
Flossing Is Better Than Not Flossing, No Matter How You Do It!
Whether you use traditional dental floss, floss picks, or even a water flosser like the WaterPik, the most important thing to do is floss regularly with your chosen product. Regular flossing along with proper brushing is the single best way to protect your oral health.
For most patients of My Family Dentistry, Invisalign aligners are preferable to metal braces for a number of reasons, including comfort and appearance.
However, metal braces are the right decision for some people, like younger children who may have trouble consistently wearing removable aligners. If you or your child has metal braces, you need to be sure you’re using the best flossing tools for braces to protect the health of your gums and teeth while they’re being straightened.
Flossing is a particular challenge for people with braces. The metal brackets and wires can get in the way of the floss, preventing you from easily cleaning in between teeth. If you want your teeth to be not only straight, but healthy and stain-free, you need to be sure to floss daily as well as brush thoroughly.
The 4 Best Flossing Tools for Braces:
#4 – Typical Floss with Threaders
You can still use regular floss with your braces, but a little extra help from a floss threader will make things much easier. You simply thread the floss through the threader, thread the floss around the wire and between teeth, floss, and repeat the process between each subsequent tooth. This process may be a little time-consuming, but it’s cheap and effective. There are a number of great brands of floss threaders available, including Dentek, Plackers, GUM, and Crest.
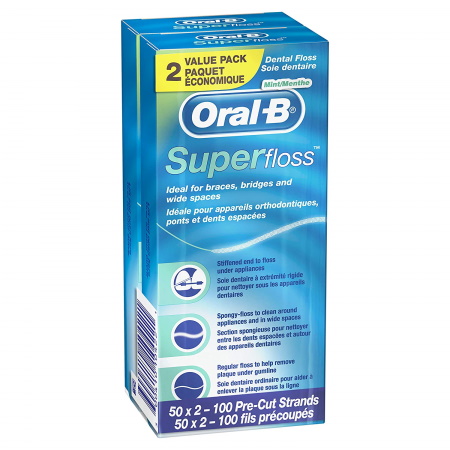
#3 – Oral-B Super Floss
Especially designed for use with braces, Oral-B Super Floss is a step up from using a floss threader. Super Floss is made from a piece of regular floss. At one end, there is a stiff piece of plastic, no bigger than the floss, but rigid enough to insert between your teeth. This plastic end allows you to quickly and easily insert the floss between teeth around braces wire, floss, and then move on to the next area. This product also includes a small area of “spongy” floss between the plastic threader and the regular floss, which allows you to clean further down under the gum line and around brackets and wires to remove more plaque and food particles before you brush.
#2 – AirFloss
The Sonicare AirFloss is a great choice for kids (or adults!) who have trouble taking the time to floss. In about 60 seconds, it can clean your entire mouth with bursts of air, and there’s no string to get caught in your braces. It’s not as inexpensive as floss threaders or Super Floss, but if you dread flossing, it will help you spend less time in front of the bathroom mirror without sacrificing your oral health.
#1 – Waterpik Water Flosser
A water flossing system like Waterpik’s Water Flosser is also ideal for braces. These systems may have a higher up-front cost than plain floss, but they’re much more comfortable and effective than traditional floss, removing as much as 99.9% of plaque when used correctly. Dr. Mullins thinks that water flossers are actually the best flossing tools for braces, because they make it so easy and comfortable to clean your teeth thoroughly!
No matter which flossing solution you choose, it is imperative to floss regularly to keep your teeth healthy. If you don’t, you may have unsightly stains or even damage when you have your braces removed!
How To Floss Back Teeth
After you have flossed one tooth you will need to repeat this process for each tooth.
The Pros of Using a Floss Threader to Floss With Braces:
- Very Inexpensive – Your orthodontist will likely give you a pack for free (or you can pick some up for a few dollars on Amazon or at a drug store)
- Reusable – One pack will likely last you months or years
- A Process You’re Already Used To – No special tools are needed, just the threader and floss.
The Cons of using a Floss Threader to Floss With Braces
- Tricky To Use At First – This is especially true for younger kids. Using the floss threader requires some hand skills that may prove difficult for young children.
- Takes Longer Than Normal Flossing – . Because you have to repeat the process of flossing beneath the wire for every tooth in your mouth, this can be a time consuming process.
Check out our video about brushing and flossing with braces! It demonstrates exactly how floss threaders are used.
Overall, using a floss threader to floss with braces works well and many patients choose this option for its cost-effectiveness. But if you’d like to find a faster or easier option, keep reading below…
How to Floss With Braces Using Superfloss
Superfloss works similarly to a floss threader, only you don’t need to do the “needle and thread” process. You simply take the stiff end of floss, guide it beneath your archwire, and floss your teeth.
The Pros of Using a Superfloss to Floss With Braces:
- Easier Than a Floss Threader – Most kids and adults figure this method out pretty easily.
- Easy To Find – It can be purchased on Amazon or at your local drug store
The Cons of using a Superfloss to Floss With Braces
- Also Time Consuming – Because you have to repeat the process of guiding the floss beneath the wire, it does take a little bit of time.
- Not Reusable – Super floss is a one-time use product, so each day you will use a new piece and throw it away. This product isn’t too expensive, but while you are in braces you will likely need several boxes to get you by.
Superfloss is a great tool that cleans well. Grab a pack next time you’re at the drug store and try it out for yourself!
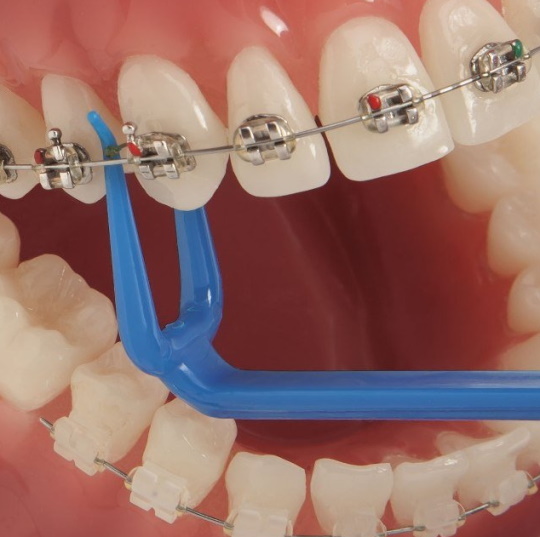
How to Floss With Braces Using a Platypus Orthodontic Flosser
There is no threading required with the platypus orthodontic flossers. The narrow side of the flosser is designed to fit behind the arch wire, allowing you to floss your entire mouth in no more than two minutes (usually less)!
The easiest way to understand how the Platypus Orthodontic Flosser works is to see it in action. Click below to watch a video about how to floss with braces using the Platypus Orthodontic Flosser.
https://youtube.com/watch?v=xGScpnsm77M%3Fcontrols%3D1%26rel%3D0%26playsinline%3D0%26modestbranding%3D0%26autoplay%3D0%26enablejsapi%3D1%26origin%3Dhttps%253A%252F%252Fyourazbraces.com%26widgetid%3D3
The Pros of Using a Platypus Orthodontic Flosser to Floss With Braces:
- Fastest Method – You can floss your entire mouth in two minutes or less.
- No Threading Required – This makes it easier for young kids who may struggle with the floss threaders on their own.
The Cons of Using a Platypus Orthodontic Flosser to Floss With Braces
- Cost More Than Floss Threaders – The Platypus Orthodontic flossers are a one-time use product, so each day you will use a new flosser and throw it away. This product is still reasonably priced, however, and you can buy them in larger packages to save money.
- Difficult To Find In-Store – This is most likely a solution you will need to order online. You can find them on Amazon with free shipping and in multiple package sizes.
How to Floss With Braces Using a Harp Orthodontic Flosser
The Harp Orthodontic Flosser is very similar to the platypus flosser – it too allows you to floss without threading. You simply guide the small end of the flosser beneath the archwire to floss your entire mouth; no threading required!
Watch the video below to learn more about the harp flosser and to see it in action.
The Pros of Using a Harp Orthodontic Flosser to Floss With Braces:
- Quick And Easy – You can floss your entire mouth in two minutes or less.
- No Threading Required – This makes it easier for young kids who may struggle with the floss threaders on their own.
- Reusable For Up To A Week – , This means less total flossers you will have to buy throughout the time you have braces.
The Cons of Using a Harp Orthodontic Flosser to Floss With Braces
- Cost More Than Floss Threaders – Harp Flossers cost more than floss threaders, but they are still very reasonable. To get a month’s supply of Harp flossers it comes out to about $5!
- Difficult To Find – They can’t be found at local drug stores or on Amazon, but you can order them direct on the Harp company website.
How to Floss With Braces Using a Waterpik or Water Flosser
A Waterpik is a popular brand of water flosser. A water flosser is a device that delivers a stream of pressurized pulsating water between your teeth, along the gum line, and around your braces. If you find that string floss, no matter the type, is too difficult to do on a daily basis, then a water flosser might be a good choice for you
If you or your child wears traditional metal braces, then your orthodontist likely stresses the importance of brushing and flossing every day to maintain good dental health. However, like many braces wearers, you may find flossing such a challenge that you skip this step in your oral hygiene routine on occasion or even neglect it completely.
Unfortunately, no matter how well you brush, you should always floss at least once a day. Flossing helps remove plaque from between teeth and below the gumline that is difficult to remove with a toothbrush alone. If you do not remove this plaque on a daily basis, then you could develop gum disease or cavities between your teeth.
Read on to learn four tips that make it easier to floss while you wear braces.
1. Use the Right Traditional Flossing Tools
One of the most time-tested and affordable ways to floss your teeth while you wear braces is to use traditional dental floss combined with a special device called a dental floss threader.
Check the label of your floss to ensure that it is waxed and not unwaxed floss. Unwaxed floss can shred when it rubs against braces wires and brackets, while waxed floss tends to glide over them smoothly.
Braces floss threaders are small loops of very stiff floss. They resemble large sewing needles. If you have difficulty maneuvering dental floss underneath your braces’ wires, you might accomplish the task much more easily with the aid of a stiff floss threader.
To use a floss threader, simply connect your floss to the loop, as you would thread a sewing needle, then use the threader to thread the floss under your braces’ wires as you floss instead of attempting to do it with your fingers.
2. Look for Orthodontic Flossers
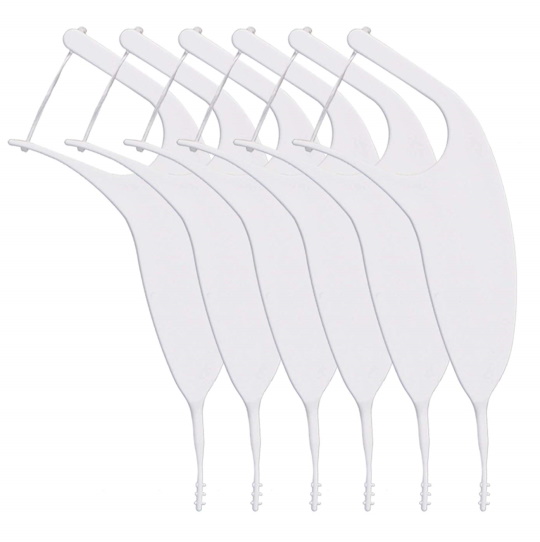
If you enjoyed the use of floss picks — small pieces of dental floss attached to small plastic handles — before you obtained braces, then you will be happy to hear that there are similar flossing tools made specifically for braces wearers.
Traditional floss picks have wide handles that are impossible to maneuver under braces wires, but orthodontic floss picks are attached to very narrow handles that often slide right under braces’ wires. Many braces wearers not only find these floss picks much easier to use than traditional floss but also find that they make flossing a much quicker task.
3. Try an Interdental Cleaner
If you would like to skip the traditional dental floss altogether, then you may want to try one of the many different interdental cleaners available today.
Some interdental cleaners are short, thin sticks made of a stiff, yet flexible material called polypropylene. You simply glide these short sticks between your teeth to remove tartar and food particles.
Other interdental cleaners, called interdental brushes, consist of thin, flexible wires with short bristles attached to them. You slide these brushes between your teeth and under the gum line to remove plaque. These brushes come in many diameters meant to perform different dental cleaning tasks, so be sure to choose a brush with a very small diameter to avoid damaging your teeth or gums.
4. Consider a Water Flosser
Another way to clean between your teeth and under your gum line when you wear braces is to use a water flosser. Water flossers project thin streams of water on and between your teeth. Water flossers can be used to remove plaque between teeth and under the gum line, just as traditional dental floss does.